Start using the Ellogon Annotation Platform
Access the Ellogon Annotation Platform Cloud Services
The Ellogon Annotation Platform Cloud Services can be accessed through the following links:
All links point to the same deployment of the Ellogon Annotation Platform (they are aliases).
1. Sign Up/Sign In
Visit https://annotation.ellogon.org to create a new account or login (if you already have registered before).

Figure 1: Login page. Use your username and password to login or click on "Click here to create one" to create a new account.
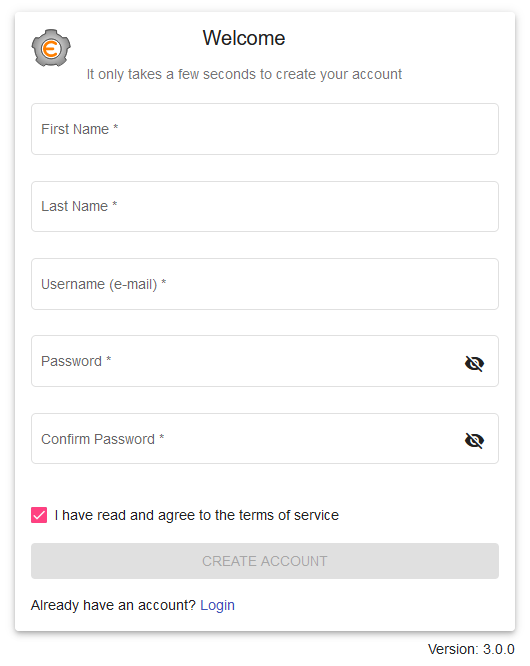
Figure 2: Register page. Enter the requested details to create a new account.
If this is the first time you visit the Ellogon Annotation Tool, create an account (Figure 2) following the steps below:
-
STEP 1: Fill in your Name, Email and Password (Figure 2).
-
STEP 2: A few moments later you will receive a confirmation email. You have to click the received link. Your account will be activated and you will be able to sign in.
If you have an activated account, choose LOGIN. You will need the Email and Password you used during the sign up process.
2. Import Data: Create a new Collection
After logging in you will be redirected to the page shown in Figure 3. This is an overview of your account. You can manage your Collections, your Annotation, Inspect the ongoing work, view the Analytics or manage your account Settings. Moreover, you can Send Feedback and use the Help to navigate through the tool.
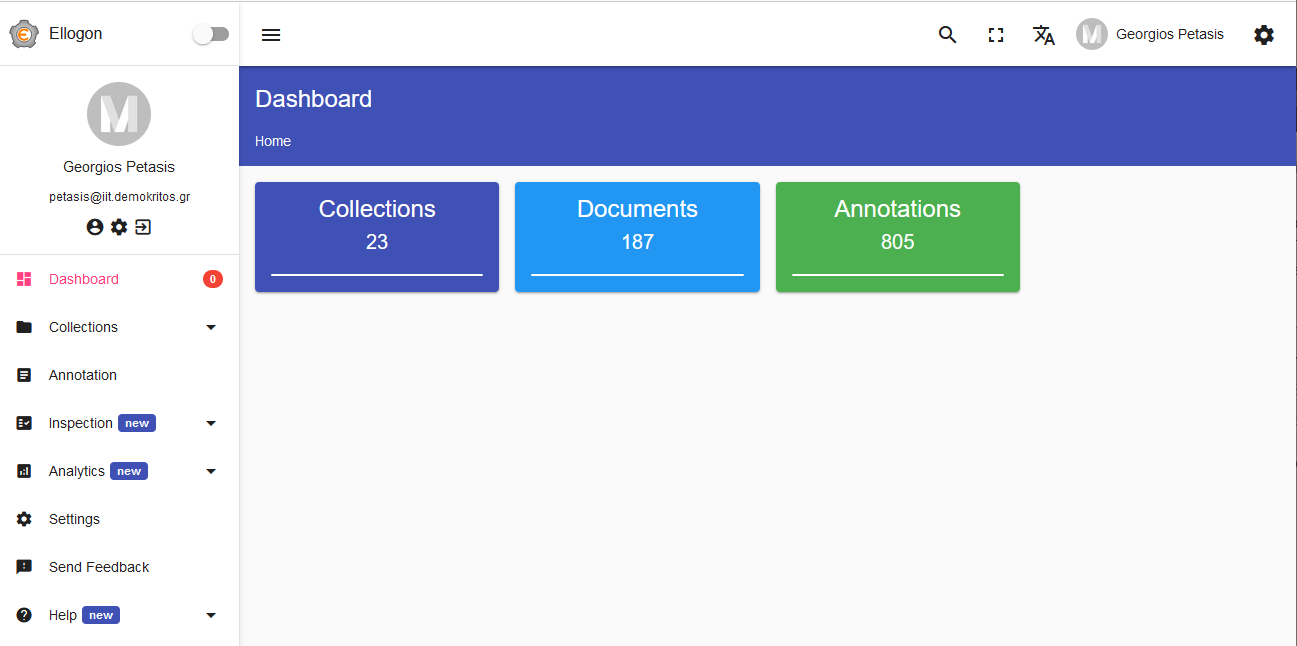
Figure 3: The user `Dashboard` page, providing some details about the user assets, along with the navigation menu on the left.
Two options are available under Collections on the menu at the left side (Figure 4):
-
To Add New Collection
-
To Manage Collections
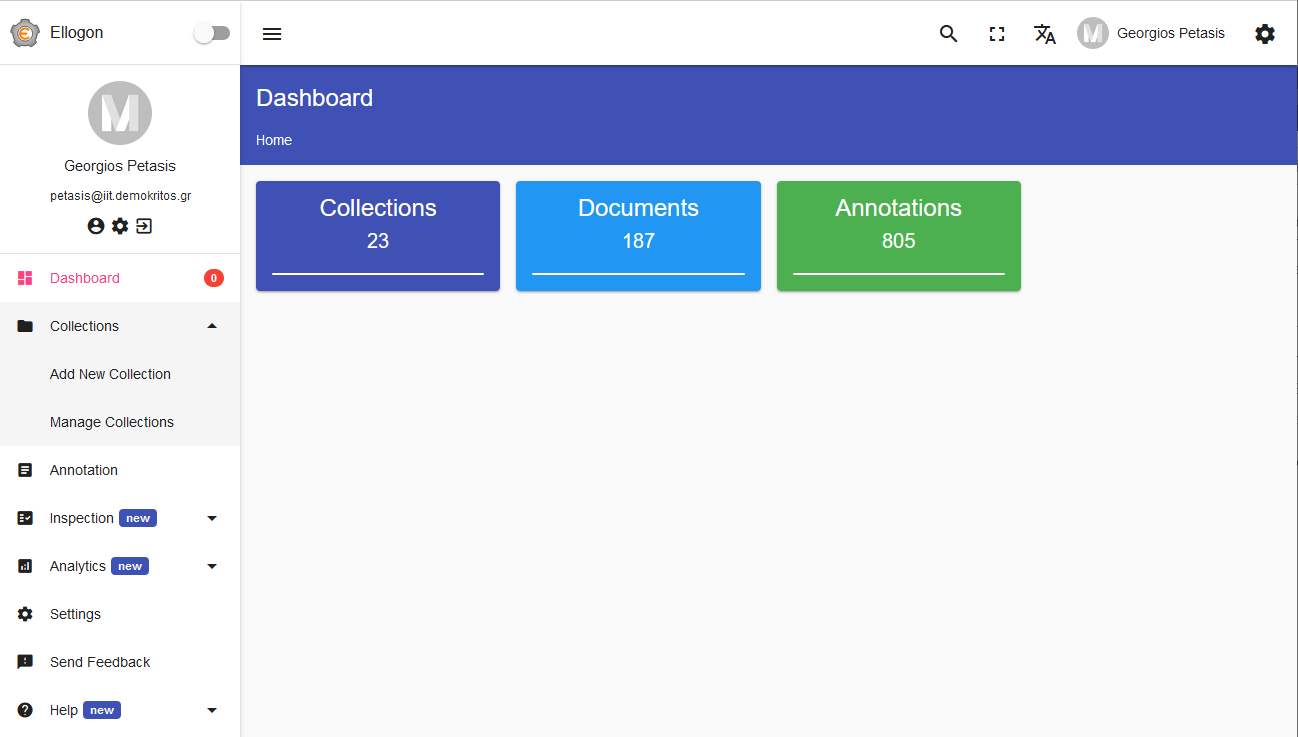
Figure 4: The `Collections` sub-menu.
To add a new collection, choose the first option. After completing the Collection Name, the Default Encoding and the Default Handler you can upload one or more files. When you are done, click ADD COLLECTION button to save it (Figure 5). After that you will be able to see your new collection by choosing Manage Collections from the Collections menu at the top bar.
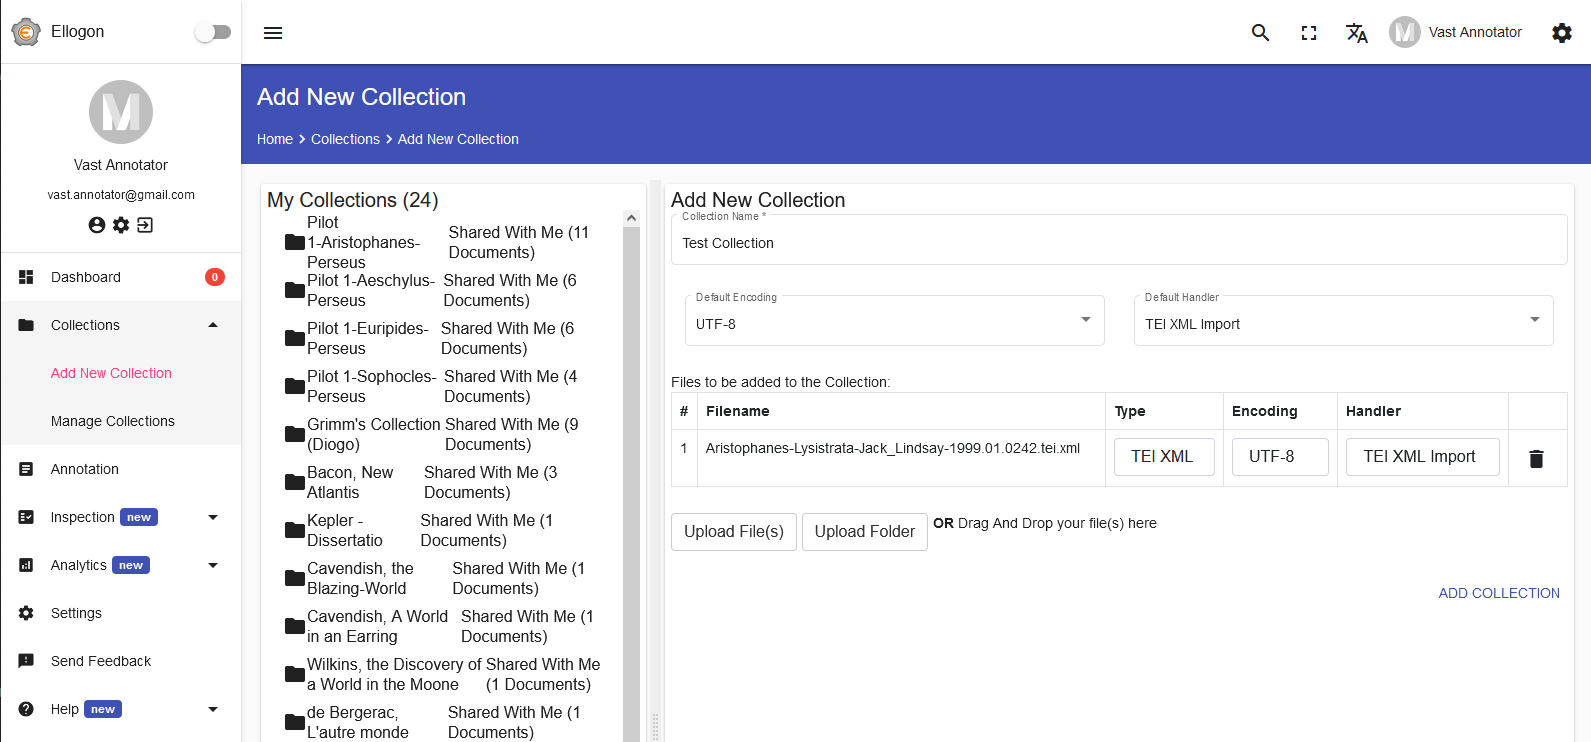
Figure 5: The `Add New Collection` page.
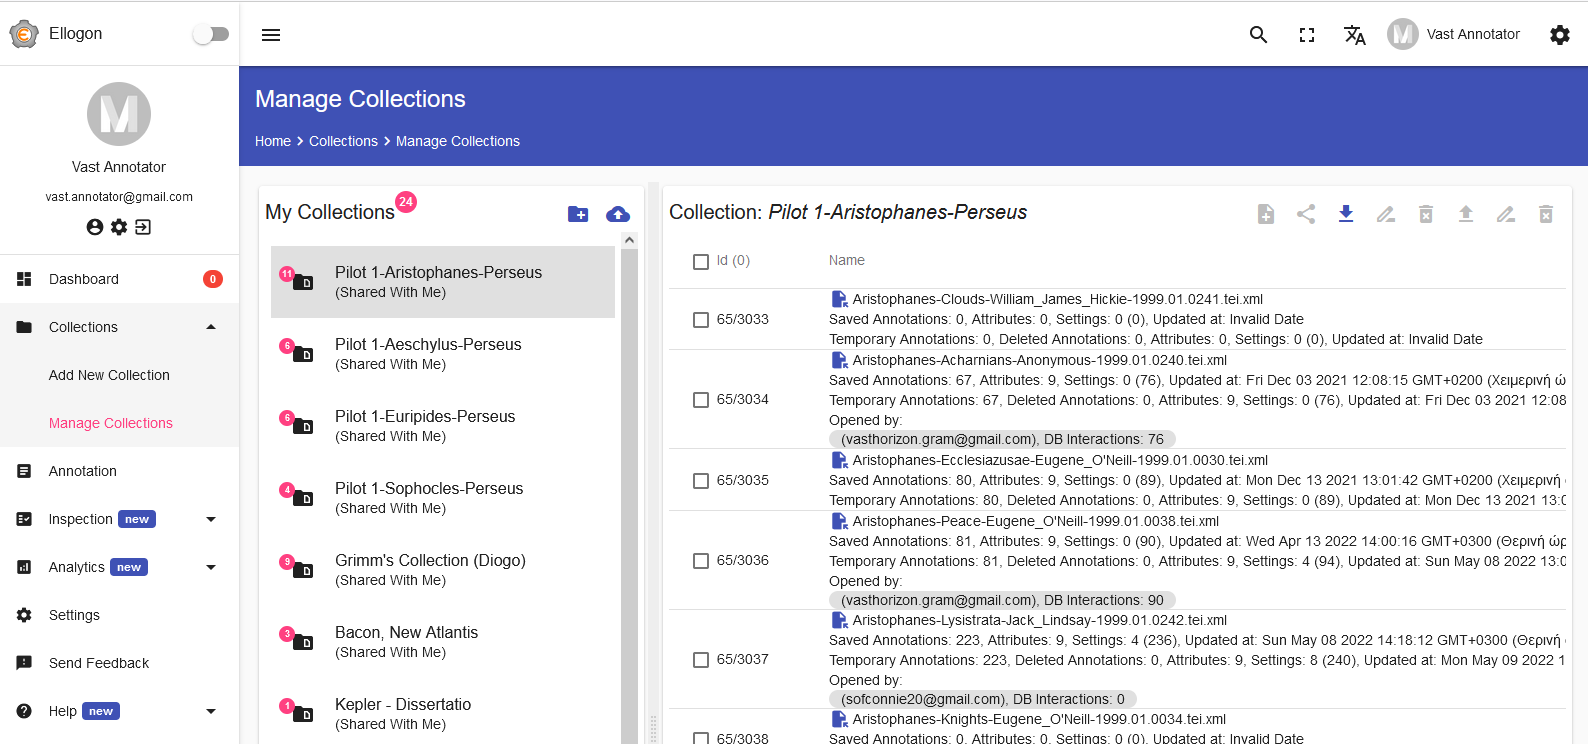
Figure 6: The new collection as browsed through the `Manage Collections` option of the menu at the left-hand side.
3. Select Document and Annotation Characteristics
To start annotating a document, please follow the steps as described below:
-
STEP 1: Choose the Annotation option of the menu at the left-hand side and you will be prompted to
Select Document(Figure 7). -
STEP 2: Choose the collection you need. The list of its documents appears (Figure 7).
-
STEP 3: Press on the document you want to annotate and the choose
SELECT(Figure 7).
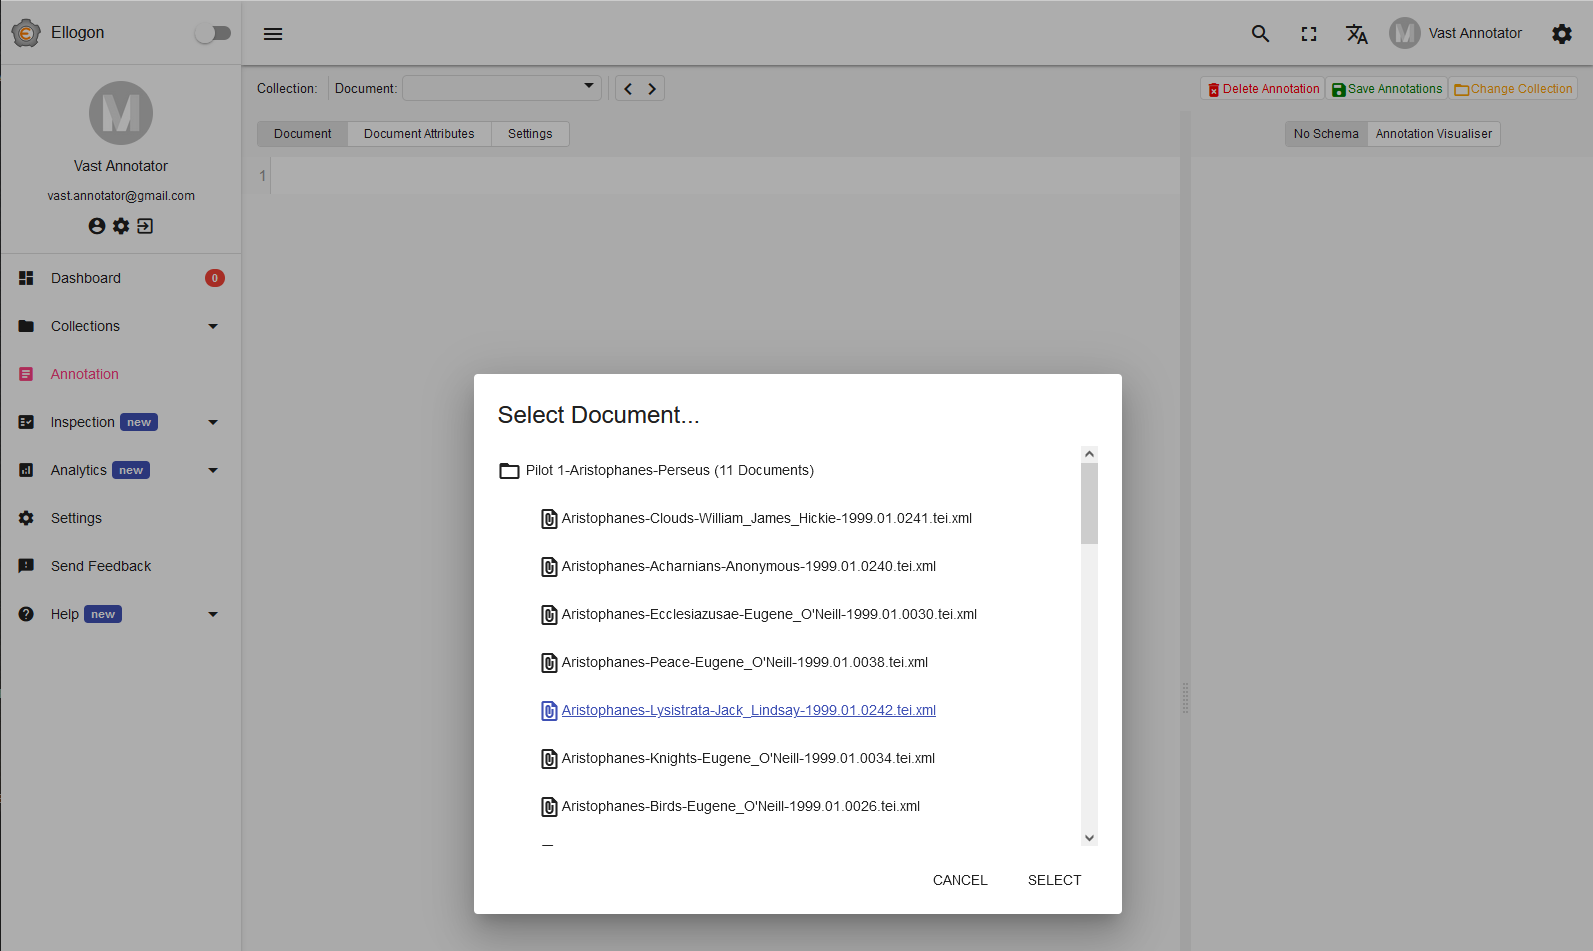
Figure 7: You can start the Annotation by first selecting a Collection, and then one of its Documents.
- STEP 4: Once the Document to be annotated is selected, select
Annotation Characteristics...(Figure 8). For example, to annotate with values, select the parameters as shown in Figure 8 and then pressOK.
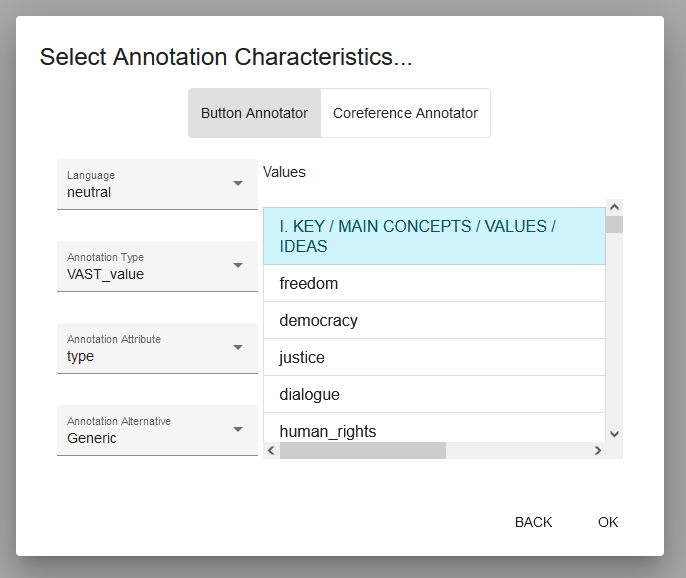
Figure 8: Selecting an annotation schema.
4. Document Annotation
After selecting the document and the VAST annotation scheme for values, as presented in the previous section, you can start the annotation. Your screen will be similar to the one presented in Figure 9. You can use the sidebar on the right to adjust the panels in a comfortable way.
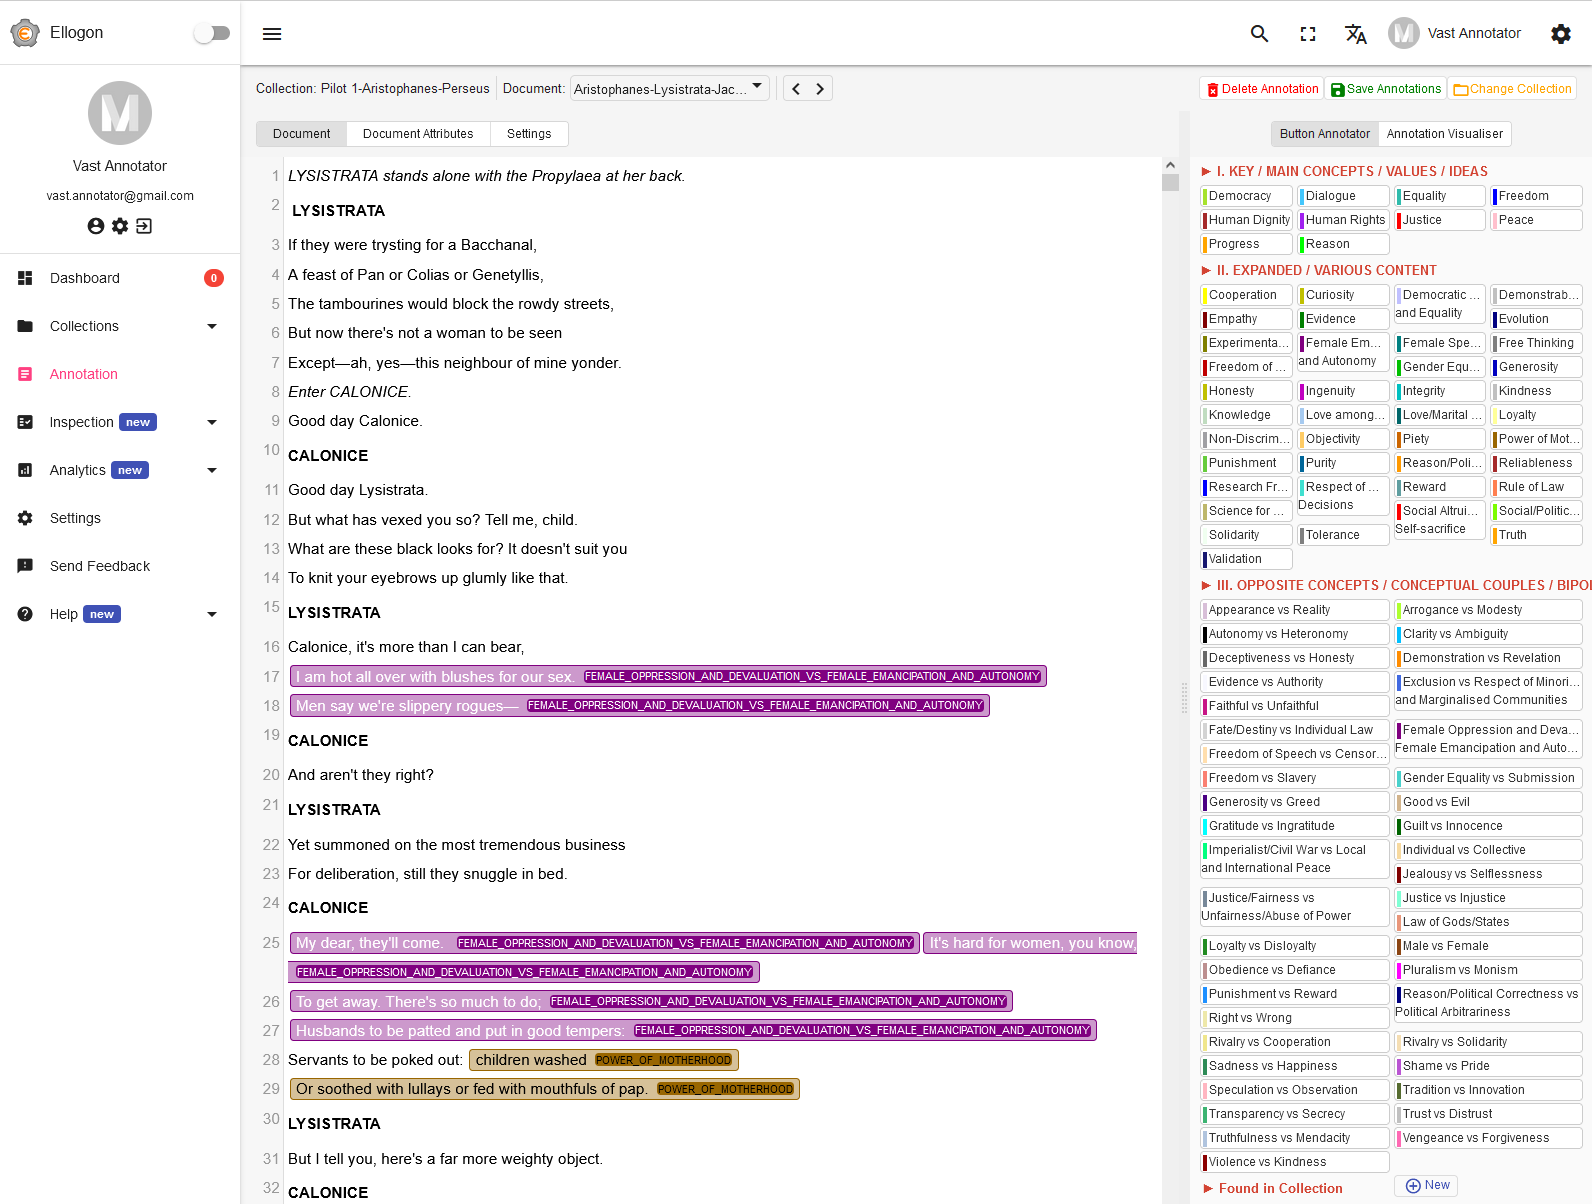
Figure 9: The Annotation interface for the selected annotation schema. The Document to be annotated is shown at the left side, while the annotation schema is shown on the right side.
The selected annotation schema is shown on the right side panel. In this case it contains a set of buttons organised in categories.
To make an annotation follow the steps below:
-
STEP 1: Select the part of the document you want to annotate. A text segment can be easily selected by simply pressing the mouse wheel on the first word to be included in the segment, and then by clicking the mouse wheel again on the last word to be included in the segment.
-
STEP 2: Press on a button from the right side panel, to annotated the selected segment with the label displayed in the button. You will immediately see that the segment is highlighted with the colour associated with the pressed button (Figure 10). By clicking on the text, the corresponding button will be also highlighted. (Figure 11).
-
STEP 3: Save (or delete) the annotation. All the annotations are saved temporarily so that they will not be lost. To save them permanently, click on the
Save Annotationsbutton on top right of the window (Figure 9). To delete an annotation, click on the annotated text and then on theDelete Annotationbutton on top right of the window.

Figure 10: To annotate the `or barely` with `Reason` select the phrase and then press the button of `Reason`.

Figure 11: Pressing on the annotated segment (to select it with the mouse), the button of the associated value is also highlighted.
The Annotation Visualiser tab provides information about each annotation such as the ID of the annotation, the span (start/end of the annotated segment, in character offset for the start of the document), the creator and the creation/update timestamps. You can navigate wither by pressing on the list of the right-hand side or within the text.
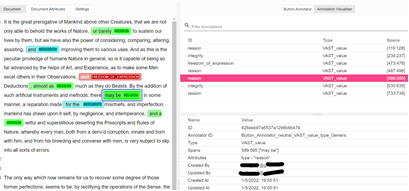
Figure 12: The Annotation Visualiser.
5. Document Attributes
Besides from annotating a document you can also fill-in several data metadata by selecting the tab Document Attributes as shown in the figure below. The metadata for this particular annotation schema include:
- The Document Title
- The Document Synopsis
- The Relations/Conditions/Bipolarities
- The Ideas/Values/Messages
- The Emblematic/Archetypical Timeless Values
- The Entities/persons
- The Interpretation/Content
- Relevant values in other (similar or not) texts
- Comments
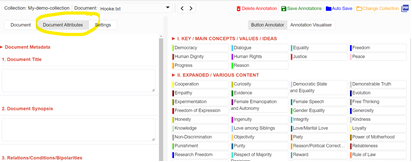
Figure 13: Document Attributes.